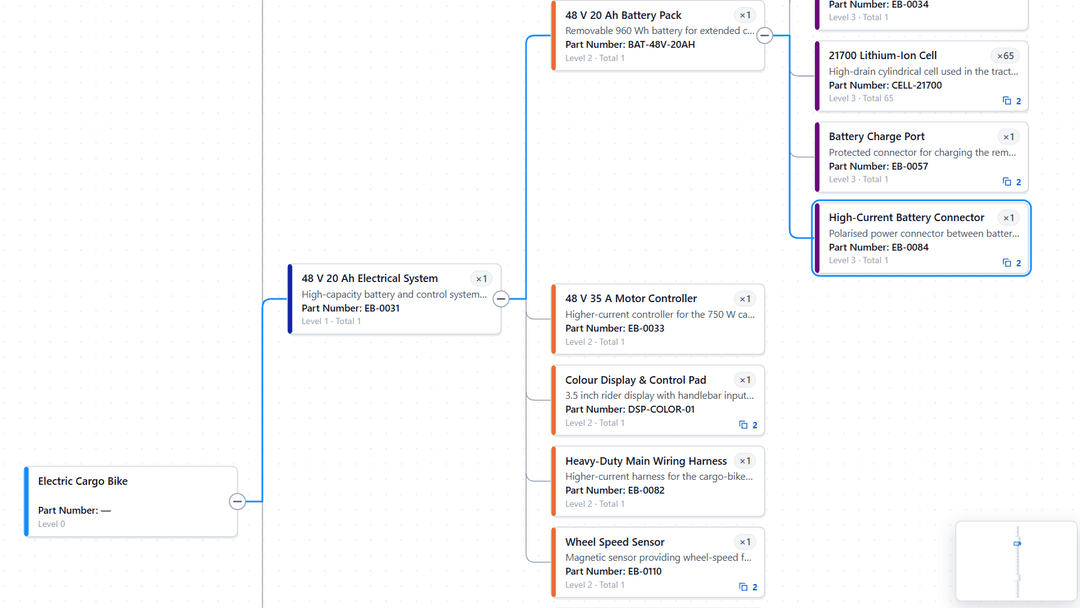

Bring in your own BOM
Turning an ERP or PLM export, an indented multi-level BOM with a Level column, one file per assembly, or a spreadsheet into the Parent–Child table Ataytis BOM reads, with the Power Query steps, plants, versions and effective dates.
What the visual needs from any source
Whatever holds your bill of materials, it has to reach Power BI as a table with these columns. You do not need levels, paths or an exploded BOM: the visual works those out.
- The parent, the assembly or product. Blank for a row that declares a top-level product.
- The child, the part, ingredient or sub-assembly the parent uses.
- A quantity, how many of the child one parent needs. Optional, but it is what extended quantities are built from.
- Anything else about the child, such as its description, position, unit, supplier, cost, status or a link to its drawing. Optional.
What your export looks like
| The export has | What to do |
|---|---|
| One row per BOM line, naming the parent and the component | Nothing. This is the shape the visual reads. Most ERP and PLM systems can export their BOM lines this way. |
| An indented, multi-level BOM, with a Level column and the parts listed under one another | Work out each row's parent in Power Query. See From an indented BOM. |
| One sheet or file per assembly, with the assembly named in the file or the sheet rather than on each row | Combine the files in Power Query, and keep the file or sheet name as the Parent column. |
| The parent written once, with the cells below it left empty, as merged cells do | Select the Parent column and choose Transform → Fill → Down. |
| All the components of a parent in one cell, such as BOLT-M5; WASHER-M5 | Choose Transform → Split Column → By Delimiter, and under Advanced options split into Rows. |
| Several plants, alternatives, versions or revisions of the same BOM | Show one at a time. See Plants, versions and alternatives. |
| Effective-from and effective-to dates on each line | Keep the lines valid on the date you want. See Effective dates. |
From an indented BOM
A multi-level BOM report lists each part under the one it belongs to, with its level beside it. The parent of a row is the nearest row above it that is one level higher, so it can be worked out in Power Query.
| Level | Part | Description | Quantity |
|---|---|---|---|
| 0 | CHAIR-01 | Office chair | 1 |
| 1 | BASE-5 | Five-star base | 1 |
| 2 | CASTOR-50 | 50 mm castor | 5 |
| 1 | SEAT-ASM | Seat assembly | 1 |
| 2 | CUSHION-S | Seat cushion | 1 |
| 2 | SCREW-M6 | M6 screw | 4 |
| 1 | BACK-ASM | Backrest assembly | 1 |
| 2 | CUSHION-B | Back cushion | 1 |
| 2 | SCREW-M6 | M6 screw | 4 |
| 1 | GASLIFT | Gas lift | 1 |
Load the export
In Power BI Desktop, select Home → Get data, choose the file, and select Transform Data. Check that the query has Level, Part, Description and Quantity columns, renaming them if they are called something else. Leave this query as it is from here on.
Make a query that starts from it
In the Queries pane on the left, right-click the export's query and choose Reference. A new query appears below it.
Note the name it refers to
With the new query selected, choose Home → Advanced Editor. Power Query has written a line such as
Source = BOM_ExportorSource = #"Indented BOM". Copy what comes afterSource =.Paste the query below
Select everything in the Advanced Editor and paste the query below over it. On its
Source =line, replaceIndentedBOMwith the name you copied, keeping the comma at the end, and select Done.Load the result
Rename the new query, for example to BOM, and select Close & Apply. It has a Parent column beside each Part. Use this query in the visual, not the export.
let
    // The query holding the export. Use the name after Source = in the query Reference made.
    Source = IndentedBOM,
    Typed = Table.TransformColumnTypes(Source, {{"Level", Int64.Type}, {"Part", type text}, {"Quantity", type number}}),
    // Rows with no level, such as blank lines at the end of a sheet, have no place in the tree
    Rows = Table.SelectRows(Typed, each [Level] <> null),
    Levels = {0 .. List.Max(Rows[Level])},
    // One column per level, holding the part on the rows at that level
    WithLevels = List.Accumulate(
        Levels,
        Rows,
        (current, level) => Table.AddColumn(current, "L" & Text.From(level), each if [Level] = level then [Part] else null)
    ),
    // Filled down, every row can see the latest part at each level above it
    Filled = Table.FillDown(WithLevels, List.Transform(Levels, each "L" & Text.From(_))),
    // The parent is the latest part one level up
    WithParent = Table.AddColumn(Filled, "Parent", each if [Level] = 0 then null else Record.Field(_, "L" & Text.From([Level] - 1)), type text),
    Result = Table.SelectColumns(WithParent, {"Parent", "Part", "Description", "Quantity"})
in
    Result
The chair comes out as ten Parent–Child rows. CHAIR-01 has a blank parent, which declares it a top-level product. SCREW-M6 is listed twice in the indented BOM, once in the seat and once in the backrest, and in the visual it is one part used in two places, each with a quantity of 4.
| Parent | Part | Quantity |
|---|---|---|
| CHAIR-01 | 1 | |
| CHAIR-01 | BASE-5 | 1 |
| BASE-5 | CASTOR-50 | 5 |
| CHAIR-01 | SEAT-ASM | 1 |
| SEAT-ASM | CUSHION-S | 1 |
| SEAT-ASM | SCREW-M6 | 4 |
| CHAIR-01 | BACK-ASM | 1 |
| BACK-ASM | CUSHION-B | 1 |
| BACK-ASM | SCREW-M6 | 4 |
| CHAIR-01 | GASLIFT | 1 |
One file per assembly
Put the files in one folder and choose Home → Get data → Folder, then Combine & Transform Data. Power Query adds a Source.Name column holding each file's name. Rename it Parent, and use Transform → Replace Values to remove the file extension, so each row names the assembly its file described.
Plants, versions and alternatives
A table that holds the same BOM more than once, for two plants, two alternatives or two revisions, repeats every parent and child. With Repeated parent and child on its default, Add quantities, the repeated rows are joined into one relationship and their quantities added, so loaded together the two copies add up:
| Parent | Child | Quantity | Plant |
|---|---|---|---|
| PUMP-A | MOTOR | 1 | 1000 |
| PUMP-A | IMPELLER | 1 | 1000 |
| PUMP-A | MOTOR | 1 | 2000 |
| PUMP-A | IMPELLER | 1 | 2000 |
Both plants together show PUMP-A needing 2 motors and 2 impellers, with the data note 2 relationships appear on more than one row. Add a slicer on Plant, set to single select under Slicer settings → Selection, and the BOM shows one plant at a time with the right quantities. A version, alternative or revision column works the same way. To fix the report to one plant for everyone, filter it on the Filters pane instead.
Effective dates
Where lines have a date they take effect and a date they stop, keep only the lines in force on the day you want. To show today's BOM, add this step in Power Query after the dates are typed as dates. A blank end date means the line has not been superseded.
Current = Table.SelectRows(Typed, each [Valid From] <= Date.From(DateTime.LocalNow()) and ([Valid To] = null or [Valid To] >= Date.From(DateTime.LocalNow())))Clean-up that prevents most problems
- Trim the Parent and Child columns with Transform → Format → Trim, so the part numbers match those in the other tables of your model.
- Where the same part is written in different cases, make the part-number columns the same case with Transform → Format → UPPERCASE. Leave descriptions as they are.
- Give Quantity a number type, such as Decimal Number, and set it to Don't summarize. Field wells and summarising explains why.
- Keep a position, find number or line number column if the export has one. It orders the components and keeps apart two lines that are otherwise identical.
- Remove header and total rows that some reports repeat on every page, with Home → Remove Rows or a filter.
Loading it into Power BI
Get the data
Select Home → Get data and choose where the BOM lives: Excel, Text/CSV, a folder, SharePoint, SQL Server or another database, Dataverse, or a connector for your ERP. The visual only sees the finished table, so what matters is its shape, not where it came from.
Reshape it if it needs it
Select Transform Data, make the changes above, then select Close & Apply.
Add the visual and fill the wells
Parent in Parent, the component in Child, the quantity in Quantity set to Don't summarize, and the description and anything else in Details.
Read the data notes
Open the editor with More options (…) → Edit. The header says how many items were found and whether there are data notes. Data notes explains each one.
When the source changes, refresh the report and the BOM is rebuilt from the new rows. The settings belong to the visual and the fields in its wells, so as long as the column names stay the same nothing needs setting up again.